[MOD HM] InFleXioN

InFleXioN [MOD HM] - Modding - Overclocking, Cooling & Modding

Marsh Posté le 11-12-2009 à 00:14:40    

Salut a tous ...  :hello:  
 
A regarder tous ces nouveaux mods, j'ai envie de m'en refaire un ...  
 
Pour l'instant, je suis en train de regarder ce que je peux récupérer dans mon bordel et a mon boulot ( tous mes mods sont faient a 80% de récup ) .
 
Donc, voila ... Pour l'instant je travail sous SketchUp, et je vous donnerai des news dès que possible ...


Avancement du projet :
 
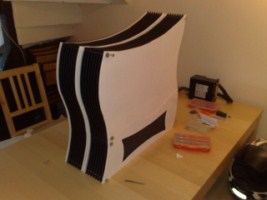
http://config76.free.fr/modding.fr/montage07.JPG


polomod a écrit :

EDIT : Voici un petit résumé pour ceux qui ne veulent pas lire toute les pages !!! ==> Merci @ wolf94 pour avoir fait le bbcode du résumé   :jap:
 
 
DEBUTONS LE PROJET MI DECEMBRE  2009
 
 
---> Désossage pour récupérer que le strict minimum :

http://config76.free.fr/modding.fr/chassi02--P.jpg    http://config76.free.fr/modding.fr/chassi03--P.jpg


--->
Et on rigidifit le tout car la tole se tord dans tous les sens :
 
http://config76.free.fr/modding.fr/chassi06--P.jpg     http://config76.free.fr/modding.fr/chassi05--P.jpg


Voila le matos en images :
 
Les gaines tressées :
 
http://config76.free.fr/modding.fr/sleeve%20small--P.jpg  http://config76.free.fr/modding.fr/sleeve%20sata--P.jpg
 
Les gaines thermo-rétractables :
 
http://config76.free.fr/modding.fr/heatshrink%20small--P.jpg  http://config76.free.fr/modding.fr/heatshrink%20sata--P.jpg
 
Le kit Sunbeam Molex Extractor :
 
http://config76.free.fr/modding.fr/molex%20extractor--P.jpg
 
Les 9 ventilateur REVOLTEC "AirGuard" :
 
http://config76.free.fr/modding.fr/revoltec%20airguard--P.jpg
 
 
Gaine Thermo :
 
http://config76.free.fr/modding.fr/07012010094%20%5B640x480%5D--P.jpg   http://config76.free.fr/modding.fr/07012010097%20%5B640x480%5D--P.jpg
 
 
Modding Ventilos :
 
Aujourd'hui, gainage du reste des ventilos et peinture des pales !!!
 
Voici les photos :
 
 
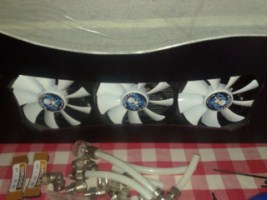
Les 6 REVOLTEC gainés :
 
http://config76.free.fr/modding.fr/08012010104%20%5B640x480%5D--P.jpg    http://config76.free.fr/modding.fr/08012010108%20%5B640x480%5D--P.jpg
 
 
je peints le reste :
 
http://config76.free.fr/modding.fr/08012010113%20%5B640x480%5D--P.jpg    http://config76.free.fr/modding.fr/08012010112%20%5B640x480%5D--P.jpg
 
 
Résultat des 6 ventilos remontés et fonctionnelles sans aucun déséquilibrage :
 
http://config76.free.fr/modding.fr/08012010114%20%5B640x480%5D--P.jpg
 
 
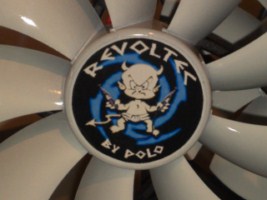
Et petit bonus "Made in PoLo" :
 
http://config76.free.fr/modding.fr/08012010117%20%5B640x480%5D--P.jpg   http://config76.free.fr/modding.fr/08012010118%20%5B640x480%5D--P.jpg


---> Plaque CG LED


[img][/img]


----->  LE MATOS POUR COMMENCER  :


J'ai recu de quoi faire mon chassi home made  :D  
 
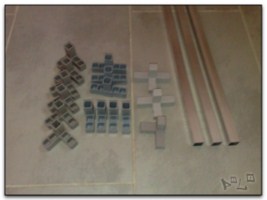
- 3 barre (20 x 20 x 1.5) de 2m
- 4 jonctios en "L"
- 3 jonction en "T"
- 7 jonction "3D"
- 2 jonction "4D"


http://config76.free.fr/modding.fr/chassi11--P.jpg  http://config76.free.fr/modding.fr/chassi12--P.jpg


----> J'ATTAQUE :


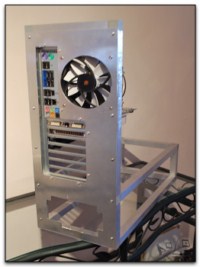
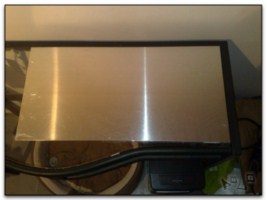
La plaque d'alu 25x50 cm :
 
http://config76.free.fr/modding.fr/plaque_ar01--P.jpg
 
 
Une fois découpé et percé : (reste a faire le trou de l'alim & d'un ventilo 120)
 
http://config76.free.fr/modding.fr/plaque_ar02--P.jpg
 
 
Le resultat finel "brut" :
 
http://config76.free.fr/modding.fr/plaque_ar03--P.jpg
 
 
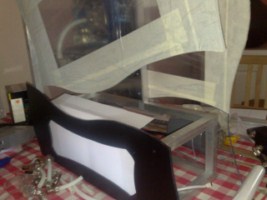
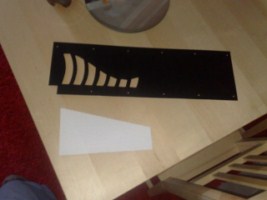
La plaque de plexi découpé :
 
http://config76.free.fr/modding.fr/plaque_sep01--P.jpg
 
 
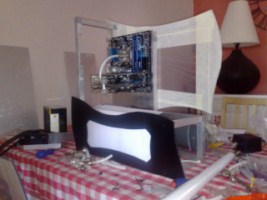
Le masque blanc posé : (pour refleter le faisceau lumineux des LEDs)
 
http://config76.free.fr/modding.fr/plaque_sep02--P.jpg
 
 
Le tout "posé" :
 
http://config76.free.fr/modding.fr/plaque_sep03--P.jpg    http://config76.free.fr/modding.fr/plaque_sep04--P.jpg
 
 
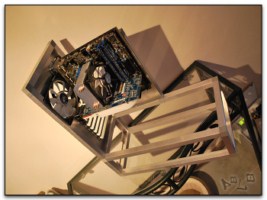
Et voici la cinfig montée :
 
http://config76.free.fr/modding.fr/plaque_sep05--P.jpg


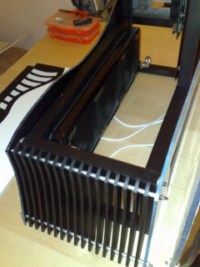
----> REALISATION CAGE   HDD  :


Je suis parti d'une plaque d'alu 500x250x0.8mm :
 
http://config76.free.fr/modding.fr/cage_HDD01--P.jpg
 
 
Tracage des plaques qui vont faire les cages :
 
http://config76.free.fr/modding.fr/cage_HDD02--P.jpg
 
 
Découpe des plaques :
 
http://config76.free.fr/modding.fr/cage_HDD03--P.jpg


Après plusieurs essais, voila ce que je suis arrivé a faire :
 
http://config76.free.fr/modding.fr/cage_HDD06--P.jpg  http://config76.free.fr/modding.fr/cage_HDD07--P.jpg


Découpe et pliage de la grille mesh qui va servir a cacher les HDD :
 
http://config76.free.fr/modding.fr/cage_HDD08--P.jpg


Et voila le resultat "brut" :
 
http://config76.free.fr/modding.fr/cage_HDD09--P.jpg

Message cité 3 fois
Message édité par polomod le 16-07-2012 à 23:37:01

---------------
www.polomod.fr   fermé    -     Facebook PoLoMoD
Reply

Marsh Posté le 11-12-2009 à 00:14:40   

Reply

Marsh Posté le 11-12-2009 à 00:23:35    

Edit du 29/05/2010 Par polo_76 : Suite du résumé
 

Citation :


*****  ETAT DU PROJET    FIN MARS   2010


http://config76.free.fr/modding.fr/chassi15--P.jpg  http://config76.free.fr/modding.fr/chassi16--P.jpg  
 
http://config76.free.fr/modding.fr/chassi17--P.jpg  http://config76.free.fr/modding.fr/chassi18--P.jpg  
 
http://config76.free.fr/modding.fr/chassi19--P.jpg  http://config76.free.fr/modding.fr/chassi20--P.jpg  
 
http://config76.free.fr/modding.fr/chassi21--P.jpg  http://config76.free.fr/modding.fr/chassi22--P.jpg  
 
http://config76.free.fr/modding.fr/chassi23--P.jpg  http://config76.free.fr/modding.fr/chassi24--P.jpg  
 
http://config76.free.fr/modding.fr/chassi25--P.jpg  http://config76.free.fr/modding.fr/chassi26--P.jpg  


--->  AVRIL 2010


J'ai commencé a me pencher sur la "carcasse" du mod .  
 
 
Place aux photos :  
 
http://config76.free.fr/modding.fr/rad01--P.jpg  http://config76.free.fr/modding.fr/rad02--P.jpg  
 
http://config76.free.fr/modding.fr/rad03--P.jpg  http://config76.free.fr/modding.fr/rad04--P.jpg  
 
http://config76.free.fr/modding.fr/rad05--P.jpg  http://config76.free.fr/modding.fr/rad06--P.jpg  
 
http://config76.free.fr/modding.fr/rad07--P.JPG  http://config76.free.fr/modding.fr/rad08--P.JPG  
 
http://config76.free.fr/modding.fr/rad09--P.JPG  http://config76.free.fr/modding.fr/rad10--P.JPG  
 
http://config76.free.fr/modding.fr/rad11--P.JPG  http://config76.free.fr/modding.fr/rad12--P.JPG  
 
http://config76.free.fr/modding.fr/rad13--P.JPG  http://config76.free.fr/modding.fr/rad14--P.JPG  


---->  PLAQUE DE SEPARATION POUR LE RAD  :  
 
 
aujourd'hui je me suispenché sur la plaque de séparation config/rad :  
 
Voila le rendu :  
 
http://config76.free.fr/modding.fr/plaque01--P.jpg    http://config76.free.fr/modding.fr/plaque02--P.jpg  
 
http://config76.free.fr/modding.fr/plaque03--P.jpg    http://config76.free.fr/modding.fr/plaque04--P.jpg  
 
pas si enorme que ca :  
- profondeur : 50 cm  
- largeur : 20.5 cm  
- hauteur : 45 cm  
 
---> le bas de la facade :  
 
http://config76.free.fr/modding.fr/facade01--P.jpg    http://config76.free.fr/modding.fr/facade02--P.jpg  


***  voici d'autres photos de la fabrication :  
 
http://config76.free.fr/modding.fr/facade05--P.jpg    http://config76.free.fr/modding.fr/facade06--P.jpg  
 
http://config76.free.fr/modding.fr/facade07--P.jpg    http://config76.free.fr/modding.fr/facade08--P.jpg  
 
http://config76.free.fr/modding.fr/facade09--P.jpg


Message édité par Charles K le 29-05-2010 à 00:09:44
Reply

Marsh Posté le 13-12-2009 à 00:07:58    

polomod a écrit :

----> Découpe du reste de ma facade, poli les tranches du plexi,
et un peu de peinture ....

 
http://config76.free.fr/modding.fr/plexi01--P.JPG    http://config76.free.fr/modding.fr/plexi02--P.JPG
 
http://config76.free.fr/modding.fr/plexi03--P.JPG    http://config76.free.fr/modding.fr/plexi04--P.JPG  
 
http://config76.free.fr/modding.fr/plexi05--P.JPG    http://config76.free.fr/modding.fr/plexi06--P.JPG
 
http://config76.free.fr/modding.fr/plexi07--P.JPG    http://config76.free.fr/modding.fr/plexi08--P.JPG
 
http://config76.free.fr/modding.fr/plexi09--P.JPG    http://config76.free.fr/modding.fr/peinture01--P.jpg  
 
http://config76.free.fr/modding.fr/peinture02--P.jpg    http://config76.free.fr/modding.fr/peinture03--P.jpg
 
http://config76.free.fr/modding.fr/peinture04--P.jpg    http://config76.free.fr/modding.fr/peinture05--P.jpg
 
http://config76.free.fr/modding.fr/peinture06--P.jpg    http://config76.free.fr/modding.fr/peinture07--P.jpg
 
http://config76.free.fr/modding.fr/peinture08--P.jpg    http://config76.free.fr/modding.fr/montage01--P.jpg


---> montage vite fait de la coque pour voir si tout passe nikel ...
 
Reponse en images :
 
http://config76.free.fr/modding.fr/montage02--P.JPG    http://config76.free.fr/modding.fr/montage03--P.JPG  
 
http://config76.free.fr/modding.fr/montage04--P.JPG    http://config76.free.fr/modding.fr/montage05--P.JPG


--->  les barres de fixation des ailettes et commencé a me pencher sur les grille des ventilos :
 
http://config76.free.fr/modding.fr/facade13--P.jpg    http://config76.free.fr/modding.fr/facade14--P.jpg  
 
http://config76.free.fr/modding.fr/facade15--P.jpg    http://config76.free.fr/modding.fr/facade16--P.jpg
 
http://config76.free.fr/modding.fr/facade17--P.jpg    http://config76.free.fr/modding.fr/facade18--P.jpg
 
http://config76.free.fr/modding.fr/facade19--P.jpg    http://config76.free.fr/modding.fr/facade20--P.jpg  
 
http://config76.free.fr/modding.fr/facade21--P.jpg    http://config76.free.fr/modding.fr/facade22--P.jpg
 
 
 :bounce:  


----> FIN AVRIL 2010 :


Merci adsl-max, aujourd'hui j'ai peint la bas du mod : (en cours de sechage  :D  )
 
http://config76.free.fr/modding.fr/peinture09--P.jpg    http://config76.free.fr/modding.fr/peinture10--P.jpg
 
http://config76.free.fr/modding.fr/peinture11--P.jpg
 
 
--->  et voila le tout monté :
 
http://config76.free.fr/modding.fr/peinture12--P.JPG    http://config76.free.fr/modding.fr/peinture13--P.JPG  
 
http://config76.free.fr/modding.fr/peinture14--P.JPG    http://config76.free.fr/modding.fr/peinture15--P.JPG
 
http://config76.free.fr/modding.fr/peinture16--P.JPG    http://config76.free.fr/modding.fr/peinture17--P.JPG


Peinture des ecrous terminé :
 
http://config76.free.fr/modding.fr/peinture18--P.JPG    http://config76.free.fr/modding.fr/peinture19--P.JPG


 :bounce:  
 
 
---> MAI 2010   :)
 
 
voila le resultat de la peinture :
 
 
http://config76.free.fr/modding.fr/peinture20--P.jpg    http://config76.free.fr/modding.fr/peinture21--P.jpg
 
http://config76.free.fr/modding.fr/peinture22--P.jpg    http://config76.free.fr/modding.fr/peinture23--P.jpg
 
http://config76.free.fr/modding.fr/peinture24--P.jpg


Message édité par polomod le 29-05-2010 à 12:34:36

---------------
www.polomod.fr   fermé    -     Facebook PoLoMoD
Reply

Marsh Posté le 13-12-2009 à 09:22:44    

Le résumé de polo, apparemment j'ai drapalisé trop vite, du coup il a plus la place :D
Je lui laisse la parole :  
 
:hello:  
 
 
----> CRUEL DILEMME ????     :pt1cable:     :lol:  
 
 
http://config76.free.fr/modding.fr/peinture20--P.jpg    http://config76.free.fr/modding.fr/peinture21--P.jpg  


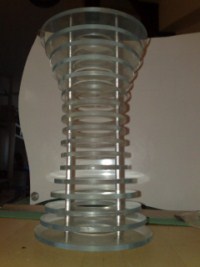
---->  J'ai eu une petite idée pour donner forme a mon resevoir Water :  
 
http://config76.free.fr/modding.fr/reservoir01--P.jpg  


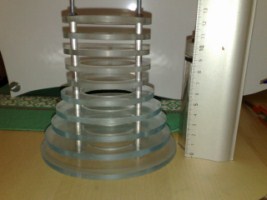
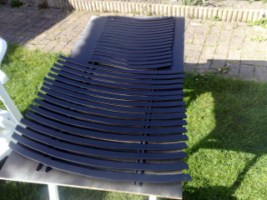
***aujourd'hui j'ai fais les 5 lamelles de 8cm de diametre pour le reservoir :  
(il me reste encore 15 lamelles a couper au total)
 
 
http://config76.free.fr/modding.fr/reservoir02--P.jpg    http://config76.free.fr/modding.fr/reservoir03--P.jpg    
 
http://config76.free.fr/modding.fr/reservoir04--P.jpg    http://config76.free.fr/modding.fr/reservoir05--P.jpg  
 
http://config76.free.fr/modding.fr/reservoir07--P.jpg    http://config76.free.fr/modding.fr/reservoir08--P.jpg  
 
http://config76.free.fr/modding.fr/reservoir09--P.jpg  


 :bounce:  
 
 
----->    MI MAI 2010 :  


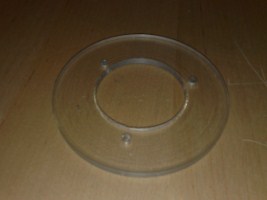
**  COURS DE REA DE LAMELLES HOME MADE :  
 
- du plexi (indispensable   :D  )  
- 1 perseuse  
- 1 meche de 4mm  
- 1 scie cloche pour bois/placo de 52mm  
- 1 etau  
- 1 lame de cutter  
 
Bref ... du matos que tout bon bricoleur possede .  ;)  
 
http://config76.free.fr/modding.fr/decoupe_res01--P.jpg    http://config76.free.fr/modding.fr/decoupe_res02--P.jpg  
 
http://config76.free.fr/modding.fr/decoupe_res03--P.jpg    http://config76.free.fr/modding.fr/decoupe_res04--P.jpg  
 
http://config76.free.fr/modding.fr/decoupe_res05--P.jpg    http://config76.free.fr/modding.fr/decoupe_res06--P.jpg  
 
http://config76.free.fr/modding.fr/decoupe_res07--P.jpg    http://config76.free.fr/modding.fr/decoupe_res08--P.jpg  
 
 
 :bounce:  


----->  TADAM ^^  
 
 
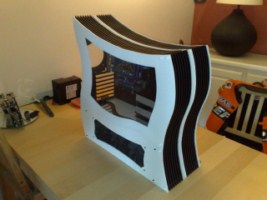
Decoupe de l'entourage du reservoir fini  :D    
 
http://config76.free.fr/modding.fr/reservoir10--P.jpg    http://config76.free.fr/modding.fr/reservoir11--P.jpg  


----> ZOLI !  
 
juste pour le fun ...  ;)  
 
http://config76.free.fr/modding.fr/wc--P.jpg    http://config76.free.fr/modding.fr/enzo01--P.jpg  
 
http://config76.free.fr/modding.fr/enzo02--P.jpg  


----> FIN MAI 2010 :  
 
 
Bon .. pour ceux qui veulent des news du mod (attention j'ai pas beaucoup avancé !!), je me suis attaqué a l'interieur du mod et je suis en train de refaire les 2 cotés (porte latérale) en MDF .  
 
http://config76.free.fr/modding.fr/int01--P.JPG    http://config76.free.fr/modding.fr/int02--P.JPG    
 
http://config76.free.fr/modding.fr/int03--P.JPG    http://config76.free.fr/modding.fr/int04--P.JPG  
 
http://config76.free.fr/modding.fr/int05--P.JPG    http://config76.free.fr/modding.fr/reservoir12--P.jpg


Message édité par arn033 le 28-05-2010 à 20:03:02
Reply

Marsh Posté le 13-12-2009 à 10:59:03    

Reserved  :kaola:

Message cité 1 fois
Message édité par polomod le 28-05-2010 à 20:21:28

---------------
www.polomod.fr   fermé    -     Facebook PoLoMoD
Reply

Marsh Posté le 13-12-2009 à 19:09:08    

Gg !! :p


---------------
"Le serveur a compris la requête, mais refuse de la satisfaire." Ou comment dire poliment a quelqu'un d'aller se faire foutre.
Reply

Marsh Posté le 13-12-2009 à 19:12:42    

Pas mal, bien trouvé^^
 
j'ai hate de voir le résultat car tes simus donne envie^^


---------------
Ma Chaine YouTube
Reply

Marsh Posté le 13-12-2009 à 20:14:40    

polomod a écrit :

Salut a tous ...  :hello:  
 
A regarder tous ces nouveaux mods, j'ai envie de m'en refaire un ...  
 
Pour l'instant, je suis en train de regarder ce que je peux récupérer dans mon bordel et a mon boulot ( tous mes mods sont faient a 80% de récup ) .
 
Par contre, je cherche des plaques de PVC transparentes rouge ( au moins 3 plaques de 500x500 mm), et sur PC-Look il n'y en a plus en vente  :(  .
 
Je cherche aussi un tuto pour brancher des LEDs d'activitées individuelles pour mes HDDs SATA ( 5 aux total, et 1 ou 2 de plus par la suite ), j'ai le tuto pour des LEDs d'activitées sur des HDDs IDE, mais j'arrive pas a en trouver pour du SATA .


Donc, voila ... Pour l'instant je travail sous SketchUp, et je vous donnerai des news dès que possible ...
 
 
P.S. : Si quelqu'un sait où je peux trouver des plaques de PVC rouge et un tuto pour les LEDs d'activitées individuelles pour HDD SATA, merci de me le faire savoir ...


[size=18][color=red]Avancement du projet :[/color][/size]
 
http://free0.hiboox.com/vignettes/ [...] 1b020d.jpg     http://free0.hiboox.com/vignettes/ [...] 008bb4.jpg     http://free0.hiboox.com/vignettes/ [...] fa8b7a.jpg


EDIT :
 
Après quelque temps passé sur Sketshup, l'esquisse du boitier prend forme :
 
Vue global :
http://free0.hiboox.com/images/500 [...] 1b020d.jpg
 
 
3D :
 
http://free0.hiboox.com/vignettes/ [...] 7deeec.png   http://free0.hiboox.com/vignettes/ [...] 723100.png  http://free0.hiboox.com/vignettes/ [...] fcfba9.png
 
 
Ouverture :
 
http://free0.hiboox.com/vignettes/ [...] cd97e6.png  http://free0.hiboox.com/vignettes/ [...] 45fc5b.png  http://free0.hiboox.com/vignettes/ [...] b5a94d.png
 
 
2D :
 
http://free0.hiboox.com/vignettes/ [...] 3af2ed.png  http://free0.hiboox.com/vignettes/ [...] 21eb40.png  http://free0.hiboox.com/vignettes/ [...] fd65f1.png  http://free0.hiboox.com/vignettes/ [...] 8a2244.png  http://free0.hiboox.com/vignettes/ [...] 5ffdda.png  http://free0.hiboox.com/vignettes/ [...] 9c6b90.png


si il te manque du plexi voici un site"EDIT:Autres" qui en vends
http://commerce.sage.com/polydis/P [...] tion.aspx?


Message édité par biohazdarx le 13-12-2009 à 20:27:43

---------------
FEED
Reply

Marsh Posté le 14-12-2009 à 16:29:37    

[:michrone] Ca change des cubes, carrés, rectangles  :D

Reply

Marsh Posté le 14-12-2009 à 16:34:46    

C'est vrai
 
En plus, j'adore le système d'ouverture du boitier  :love:


---------------
Ma Chaine YouTube
Reply

Marsh Posté le 14-12-2009 à 16:34:46   

Reply

Marsh Posté le 16-12-2009 à 13:44:21    

Yo !
j'suis pas très fan de la forme du boîtier, même si c'est effectivement original, en revanche j'adore ton système d'ouverture !

Reply

Marsh Posté le 16-12-2009 à 15:51:56    

merci, en ce moment je suis en train de buter sur "comment fixer les ventilos avant" ???  :??:  :??:  :??:  
 
Soit ils restent sur la coque du boitier (donc ils se levent avec la coque) ou je les mets fixe (donc fixés au socle avec les HDD) .


---------------
www.polomod.fr   fermé    -     Facebook PoLoMoD
Reply

Marsh Posté le 16-12-2009 à 16:00:30    

fixe les au socle, même si c'est plus compliquer, sinon ça va être chiant avec les fils pour l'ouverture
imagine les fils qui pendouille quand tu ouvrira  :(


Message édité par Charles K le 16-12-2009 à 16:01:25
Reply

Marsh Posté le 17-12-2009 à 23:52:02    

après il peut toujours avoir des rallonges qui remontent l'ouvrant et qui vont jusqi'à la charnière, mas en effet, je suis plus partisant du ventilo qui reste fixe sur le socle

Reply

Marsh Posté le 18-12-2009 à 13:38:15    

drap!

Reply

Marsh Posté le 18-12-2009 à 20:46:40    

mega drap!!!


---------------
Quand tu me parles de ton mac, j'ai l'impression de lire "tu sais que je suis en chaise roulante, je peux pas atteindre l'étagère du haut ...mais j'ai des franges sur les poignées alors c'est joli" - DTC.com /// "Vieux, gros, roux et gaucher" :(
Reply

Marsh Posté le 18-12-2009 à 23:20:47    

je suis en train faire une maquette en carton pour voir les possibilitées que j'ai ... je posterais les tofs bientot .


---------------
www.polomod.fr   fermé    -     Facebook PoLoMoD
Reply

Marsh Posté le 22-12-2009 à 09:56:52    

Drapal, bien trouvé comme idée, c'est pas courant [:implosion du tibia]

Reply

Marsh Posté le 24-12-2009 à 13:02:48    

Bon, vu que c'est mon 1er jour de vacance  :D  , je me suis mis une petite heure sur le MOD ...
 
Je me suis penché sur le chassi ....
 
En fouillant un peu (enfin ... beaucoup !!! :lol: ) dans mon bordel, j'ai retrouvé une veille tour toute pourrie :
 
http://images3.hiboox.com/images/5209/f0b2cb76546c0e76d5b3be59ab477969.jpg


..................... Mais non ................ la voici :
 
http://images3.hiboox.com/images/5209/abba01c400c35f63d47151175dec10fd.jpg
 
 
Ensuite on passe au désossage pour récupérer que le strict minimum :
 
http://images3.hiboox.com/images/5209/e66df07cc7aa9ec21d1aa257fe3ca5bb.jpg
 
http://images3.hiboox.com/images/5209/70f741a0ac01745c673b6bc6fe962b5b.jpg


Et on rigidifit le tout car la tole se tord dans tous les sens :
 
http://images3.hiboox.com/images/5209/291dd50e11a07a34e961d570cdd62220.jpg
 
http://images3.hiboox.com/images/5209/54c1364de3359562bcf27fc0803d07e1.jpg


Voila, c'est tout pour moment !!!


---------------
www.polomod.fr   fermé    -     Facebook PoLoMoD
Reply

Marsh Posté le 24-12-2009 à 14:05:02    

polomod a écrit :

Bon, vu que c'est mon 1er jour de vacance  :D  , je me suis mis une petite heure sur le MOD ...
 
Je me suis penché sur le chassi ....
 
En fouillant un peu (enfin ... beaucoup !!! :lol: ) dans mon bordel, j'ai retrouvé une veille tour toute pourrie :
 
http://images3.hiboox.com/images/5 [...] 477969.jpg


..................... Mais non ................ la voici :
 
http://images3.hiboox.com/images/5 [...] ec10fd.jpg
 
 
Ensuite on passe au désossage pour récupérer que le strict minimum :
 
http://images3.hiboox.com/images/5 [...] 3ca5bb.jpg
 
http://images3.hiboox.com/images/5 [...] 962b5b.jpg


Et on rigidifit le tout car la tole se tord dans tous les sens :
 
http://images3.hiboox.com/images/5 [...] d62220.jpg
 
http://images3.hiboox.com/images/5 [...] 3d07e1.jpg


Voila, c'est tout pour moment !!!


Ca va faire une deuxième vie à cette magnifique (ou pas) tour IBM :D (juste comme ça elle date de quand ?)

Reply

Marsh Posté le 24-12-2009 à 14:14:58    

Elle date de Win95  :lol:  :lol:  :lol:  
 
Euh .... 2eme vie  :whistle: Je crois qu'il ne va plus rester geand chose de ce beau IBM  :D


Message édité par polomod le 24-12-2009 à 14:15:08

---------------
www.polomod.fr   fermé    -     Facebook PoLoMoD
Reply

Marsh Posté le 24-12-2009 à 14:27:36    

Bah la tôle c'est toujours ça [:tinostar]
 
bonne chance en tout cas.

Reply

Marsh Posté le 24-12-2009 à 14:52:47    

merci  ;)


---------------
www.polomod.fr   fermé    -     Facebook PoLoMoD
Reply

Marsh Posté le 24-12-2009 à 14:53:49    

Tu as du boulot mais cela donnera un truc sympa


---------------
Ma Chaine YouTube
Reply

Marsh Posté le 26-12-2009 à 12:09:17    

J'ai eu une autre idée pour rigidifier le chassis et qui sera invisible une fois la coque mise .  
 
J'ai repris les paneaux de mon beau IBM ^^ et j'ai fais les découpes :
 
http://images3.hiboox.com/images/5209/28fc5fbff9ed456841f4148103d8fa94.jpg
 
http://images3.hiboox.com/images/5209/8403e3ac0e61a83238625c03185147d2.jpg
 
http://images3.hiboox.com/images/5209/e293a689deae932e2ea078e7aba06dbc.jpg
 
http://images3.hiboox.com/images/5209/320daceeaf664a44f395fae4c34f514c.jpg
 
 
Bon, il faut s'imaginer tout ca poncé et peint en noir ...
Je trouve ausi que le chassis va etre beaucoup plus rigide comme ca !!! Il y aura moins de chance que le chassis pli avec le poid de la coque .


---------------
www.polomod.fr   fermé    -     Facebook PoLoMoD
Reply

Marsh Posté le 26-12-2009 à 12:14:18    

Pour l'instant ça se présente bien! bonne continuation  [:cerveau dawa noel:2]

Reply

Marsh Posté le 30-12-2009 à 17:36:17    

Up,  
 
Gaine tressée commandé !!! Sur le site http://www.mdpc-x.com/  
D'après ce que j'ai pu lire sur le net, leurs gaines sont d'excellente qualité !
Et aussi 9 Ventilateurs REVOLTEC "AirGuard" (que je vais modder un peu) et un Kit Molex Extractor SUNBEAM sur http://www.aquatuning.fr/  
 
Maintenant reste plus qu'a attendre les colis ...   :D


---------------
www.polomod.fr   fermé    -     Facebook PoLoMoD
Reply

Marsh Posté le 30-12-2009 à 17:45:20    

polomod a écrit :

Up,  
 
Gaine tressée commandé !!! Sur le site http://www.mdpc-x.com/  
D'après ce que j'ai pu lire sur le net, leurs gaines sont d'excellente qualité !


elles le sont !  :D

Reply

Marsh Posté le 30-12-2009 à 18:03:22    

T'as deja commandé chez eux ???


---------------
www.polomod.fr   fermé    -     Facebook PoLoMoD
Reply

Marsh Posté le 30-12-2009 à 18:05:34    

[:drap] sympa l'idée

Reply

Marsh Posté le 30-12-2009 à 18:15:11    

merci boetnroll  ;)


---------------
www.polomod.fr   fermé    -     Facebook PoLoMoD
Reply

Marsh Posté le 30-12-2009 à 18:40:34    

Vivement les autres photos^^


---------------
Ma Chaine YouTube
Reply

Marsh Posté le 30-12-2009 à 22:01:35    

Voila le matos en images :
 
Les gaines tressées :
http://config76.free.fr/modding.fr/sleeve%20small.jpg  http://config76.free.fr/modding.fr/sleeve%20sata.jpg
 
Les gaines thermo-rétractables :
http://config76.free.fr/modding.fr/heatshrink%20small.jpg  http://config76.free.fr/modding.fr/heatshrink%20sata.jpg
 
Le kit Sunbeam Molex Extractor :
http://config76.free.fr/modding.fr/molex%20extractor.jpg
 
Les 9 ventilateur REVOLTEC "AirGuard" :
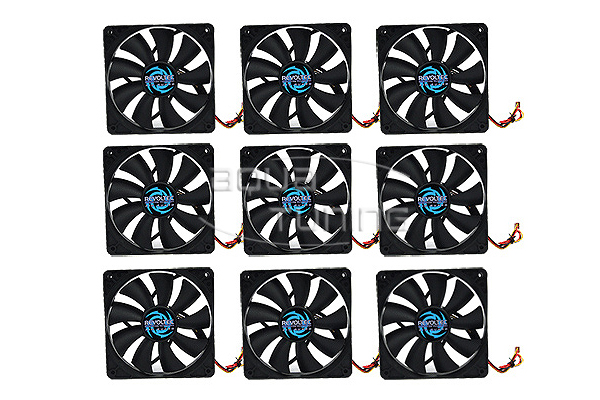
http://config76.free.fr/modding.fr/revoltec%20airguard.jpg


---------------
www.polomod.fr   fermé    -     Facebook PoLoMoD
Reply

Marsh Posté le 30-12-2009 à 22:02:22    

ça va donner quelque chose de sympa tout ça :jap:

Reply

Marsh Posté le 30-12-2009 à 22:04:52    

bah, j'espère !!!  
 
Dès que je reçois mes commandes, je UP avec des tofs ...  ;)


---------------
www.polomod.fr   fermé    -     Facebook PoLoMoD
Reply

Marsh Posté le 30-12-2009 à 22:09:07    

Que du beau matos^^


---------------
Ma Chaine YouTube
Reply

Marsh Posté le 30-12-2009 à 22:13:23    

:D  
 
 
Ah, j'oubliais ... les pales des ventilateurs REVOLTEC "AirGuard" vont être peint en blanc  :love:


---------------
www.polomod.fr   fermé    -     Facebook PoLoMoD
Reply

Marsh Posté le 31-12-2009 à 01:09:52    

Reply

Marsh Posté le 31-12-2009 à 19:30:07    

possible te prendre de la gaine blanche tressée et thermo qd tu auas fini ? ( je paye bien sur :D )


---------------
FEEDBACK HFR  
Reply

Marsh Posté le 02-01-2010 à 18:48:57    

noobzed a écrit :

possible te prendre de la gaine blanche tressée et thermo qd tu auas fini ? ( je paye bien sur :D )


Deja je vais voir si j'en ai assez pour moi :lol:  
 
Sinon il te faut quoi ??? (en quantitée)


Message édité par polomod le 02-01-2010 à 18:49:23

---------------
www.polomod.fr   fermé    -     Facebook PoLoMoD
Reply

Marsh Posté le    

Reply

Sujets relatifs:

Leave a Replay

Make sure you enter the(*)required information where indicate.HTML code is not allowed